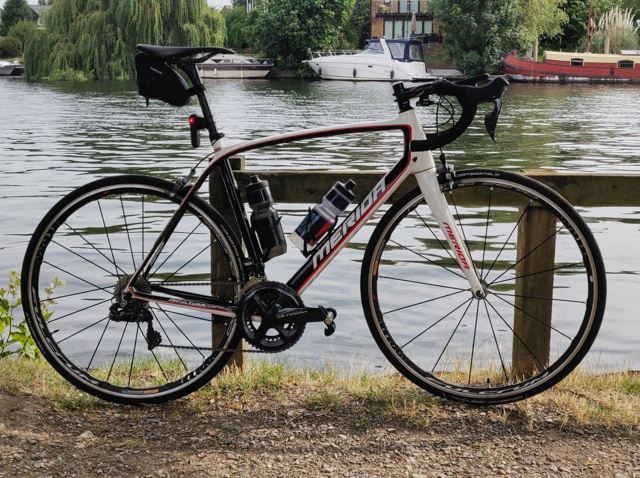
My road bike is a 2013 Merida Scultura Comp 905, with an electronic shifting compatible carbon frame and the 10-speed Shimano Ultegra 6700 groupset and rim brakes. I recently purchased the Ultegra 8050 groupset and, in this post, I describe the steps that were needed to install on the frame and some observations based on the experience.
But first of all, since I have changed already some components from the stock Scultura 905, the before-after components for the changes from mechanical groupset to electronic groupset are shown in the table below
| Component | Original | Upgraded |
| Front Derailleur | FD-6700 | FD-R8050 |
| Rear Derailleur | RD-6700 | RD-R8050-SS |
| Chainset | 6750 50/34 | R8000 50/34 |
| Cassette | CS-6700 11/28 | CS-R8000 11/28 |
| Shifters | ST-6700 | ST-R8050 |
| Brakes | Merida Pro | BB-R8000 |
| Seatpost | Deda Elementi Superleggero 27.2mm | [same] |
| Wheelset | Fulcrum Racing Comp | Fulcrum Racing Zero Black |
| Chain | Ultegra 6700 10-speed | CN-HG601 |
| Bottom bracket | Ultegra 6800 | [same] |
| Battery | - | BT-DN110-A |
| Junction boxes | - | SM-EW90-A (frame) and SM-JC41 (internal) |
| Wireless unit | - | EW-WU111 |
The components already changed aided the electronic shifting upgrade:
- The original seatpost (Merida Carbon) was broken in 2018 and replaced with the Deda Elementi one. It supports the internal battery using seatpost battery holder
- The chainset (FSA Energy Mega 50/34) was broken in 2018 and replaced with the Ultegra compact equivalent. I changed the bottom bracket at the same time from the FSA Mega Exo to the Shimano 6800 one. This ensures compatiblity with the updated chainset.
Some more components to consider, which were used for the installation and operation:
- Deda seatpost battery holder: Needed to mount the battery inside the seatpost. You could make something custom, but this is pretty neat.
- EW-SD50 wires: Various lengths, depending on the frame size and location of each of the components.
- SM-GM01 and SM-GM02 grommets: Used to secure the wires when entering the frame.
- SM-AD91 band adapter: Needed if the frame doesn't have a front derailleur hanger
- EW-SD501 wire holders: Place on the wires that are routed inside the frame. Prevents rattling noise and helps you keep your sanity.
- Concerning the wheels, the hub was only 10-speed compatible, so an upgrade was needed :)
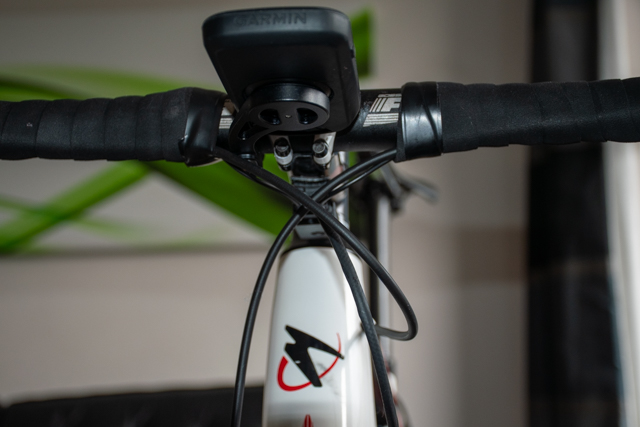
- The wireless unit is not mandatory, but it allows to connect the di2 mechanism to the GPS head unit. This function is used to check the current battery and gear combination, as well as to control the head unit from the shifters.
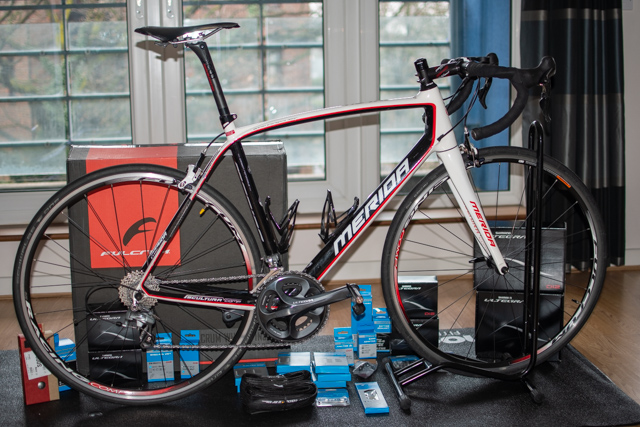
Here is the bike at its mechanical shifting state, together with all of the components. Logistics to get all the compatible parts is not the easiest part in the world.
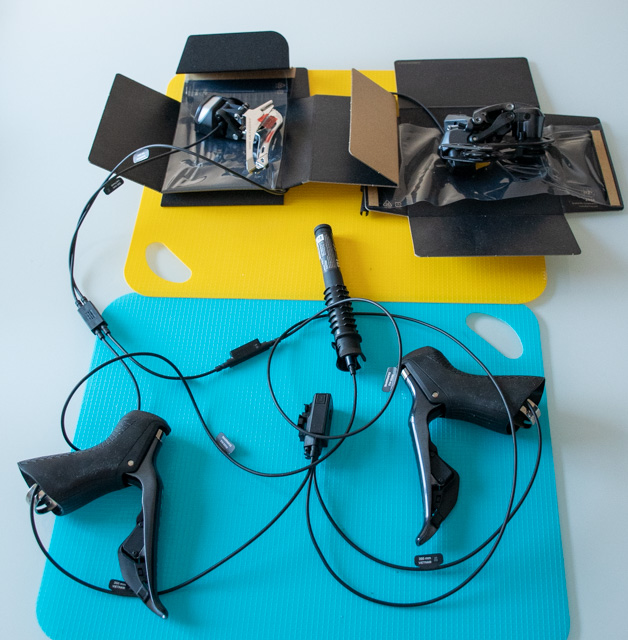
Before starting to route cables through the frame, it is a good idea to check that all of the components are working with the intended connections, on the bench (or table). I connected the wireless transceiver between the top and bottom junction box and upgraded the firmware of all the components.
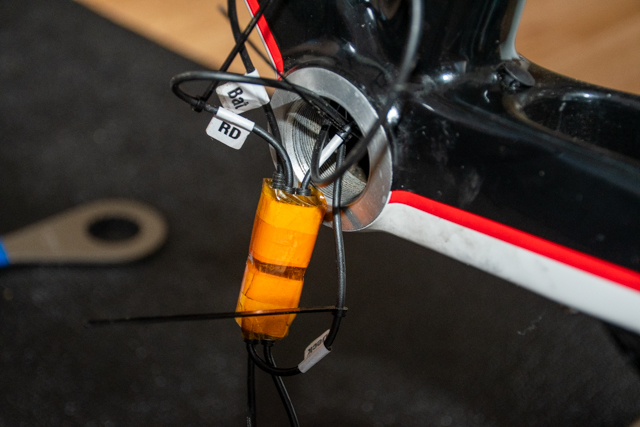
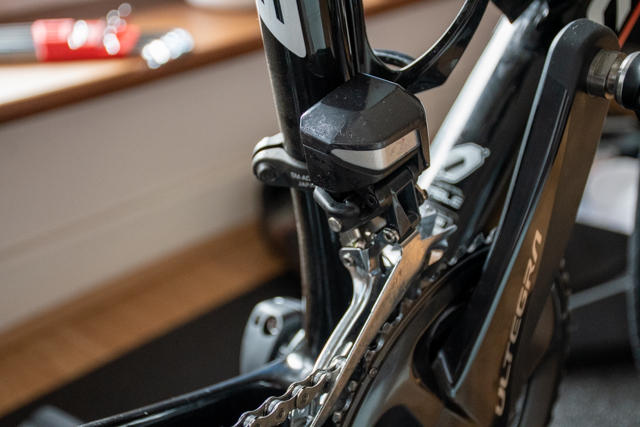
There is a junction box that goes next the bottom bracket. I also placed the wireless transceiver next to it and packaged it to avoid any rattling inside the frame. Although Shimano does not recommend placing the transceiver inside the frame, I haven't had any connection issue with the head unit or phone. Because of all the various connections inside this tight space, I labeled all the cables, in case modifications/troubleshooting are need in the future.
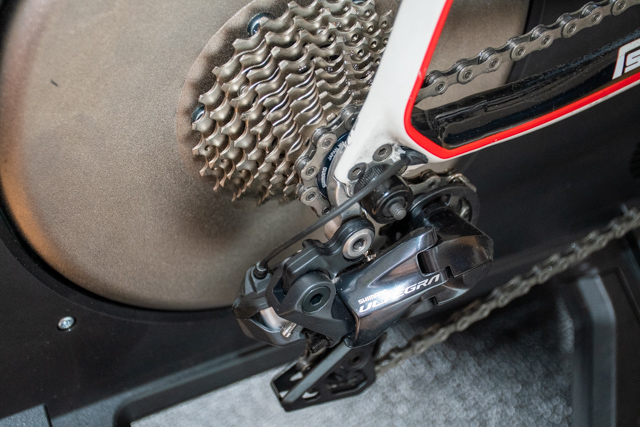
The rear derailleur is easy to fit. However, it is difficult to make the grommet stay in place. It needs some patience. The high and low screws need to be setup (as is the case with a mechanical derailleur). However, the "cable tension" is setup electronically.
Shimano has very detailed diagrams on how to assemble the front derailleur with a band adapter (my frame doesn't have a derailleur hanger). I didn't need to do any adjustment after that.
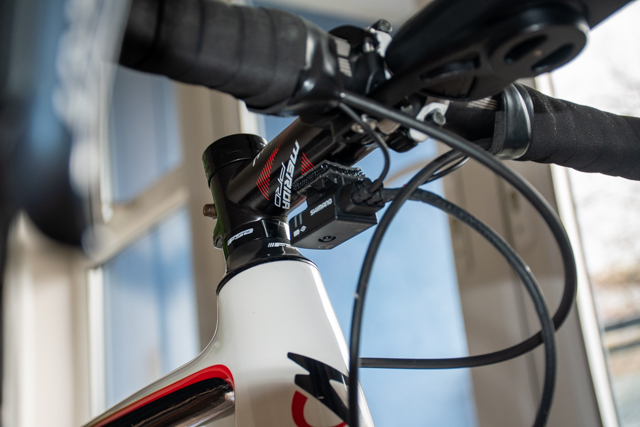
I placed the junction box underneath the stem, with some velcro tape. Though I haven't needed to remove the junction box yet and don't think I will anytime soon. However, I didn't like Shimano's solution with the elastic band (I find it ugly). However, if you were to ride on cobblestones, perhaps this would be the only solution. I used heatshrink to increase a bit the the width of the Di2 cable and fit it between the junction box and the frame.
As I wanted to get extra buttons to shift the rear derailleur from the top instead of the hoods, I modified some buttons from eBay with the Di2 connector (cut a Di2 cable in half and soldered it to the end of the flexi of the button, and then applied hot glue). This can be connected to sprint shifter port of the Di2 shifters.

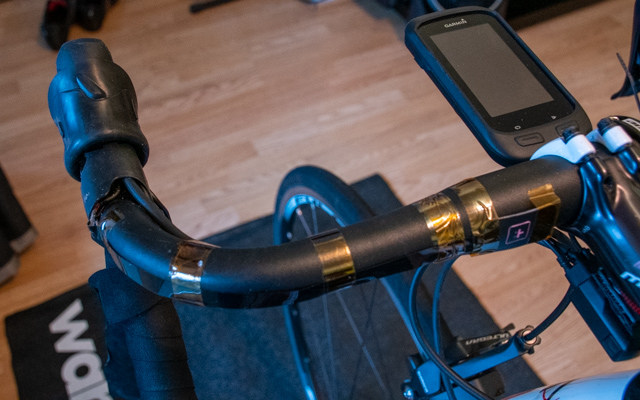
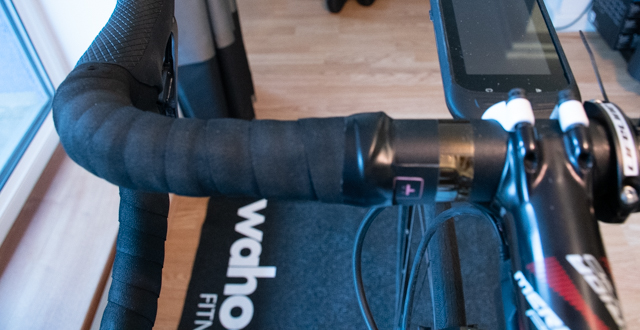
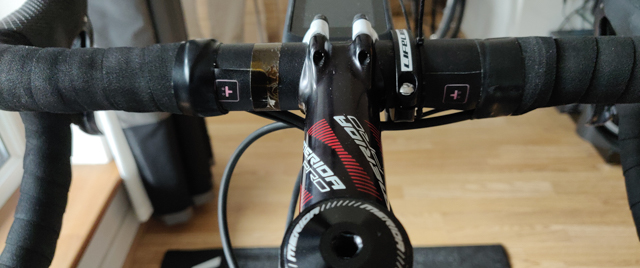
Finished result:
Not needing to adjust the cable tension every now and then is nice. As you lose the feedback on the shifter to understand at which point of the cassette you are, it is beneficial to have the current value on the head unit. It also provides audible feedback when you reach either limit of your gearing. Concerning battery, you forget to charge it (although it alerts you when the Di2 battery is getting low). Concerning traveling, I'd argue that it is easier to disassemble the bike (I leave the battery inside the seatpost and disconnect the cable, I also disconnect the two cables from the shifters to the junction box).